
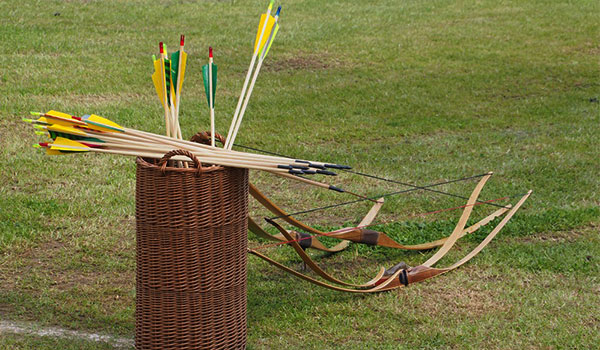
Historically, the oldest form of recurve bow has been found to be at the 8th Century BC. The Dacians, Persians, Cumans, Hyksos, Magyars, Scynthians, Greeks, Chinese, Mongols, Turks, and Huns used recurve bows made out of composite materials. People of Egypt and much of Asia started using recurve bows during the 2nd millennium BC. The drier European countries used a type of recurve bow termed as composite and the fully made of wood straight longbows were used in wetter lands during the middle ages. But with the evolution of effective firearms, recurve bows’ widespread use as a war weapon came to an end.
Over the centuries, archery has developed as has its tools. Modern-day recurve bows come with a detachable version, known as a Takedown Bow. Takedown bows have become popular due to the convenience of easy transportation and storage. Takedown bows also allow you to change their limbs, essentially the draw weight whereas traditional recurve bows used to have fixed draw weight and fell short in this aspect.
However, you will need to know how to assemble and string a Takedown Recurve Bow before you can use it. This post will give you a thorough idea on how to string a recurve bow. Let’s take a look at assembling and recurve bow tuning.
Different Parts of Recurve Bows
You have to know the parts of a recurve bow before knowing how to string a recurve bow. The most popular form of the recurve bow in the modern times comes in the form of a Takedown Bow. Takedown bows are comprised of three main parts: The riser, the limbs, and the bowstring. Another required part will be the nocking rings. Depending on the model, it might also come with a set of screws and a detachable arrow rest. Additional attachments like sights, v-bar, stabilizers, etc. are also available.
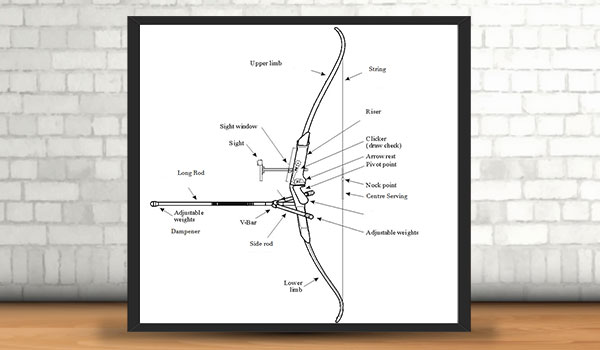
The major parts of a modern takedown recurve bow and their functions are discussed below – something you should be familiar with before delving into archery.
- The Riser –The centerpiece of a recurve bow is termed as the riser. It is the main part that will stick with you all the time. The riser, located in the middle of the limbs, can be termed as the bow’s backbone where other parts are connected. Nowadays risers are made of aluminum and carbon fiber instead of wood because of humidity issues of wood.
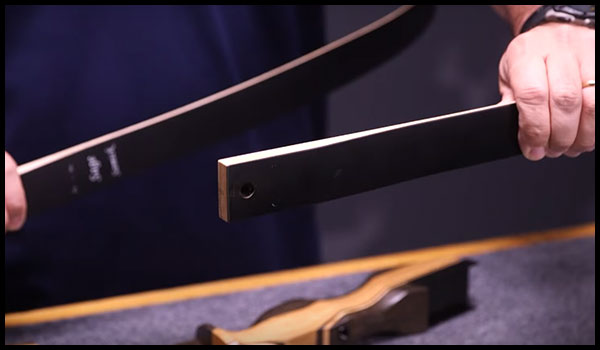
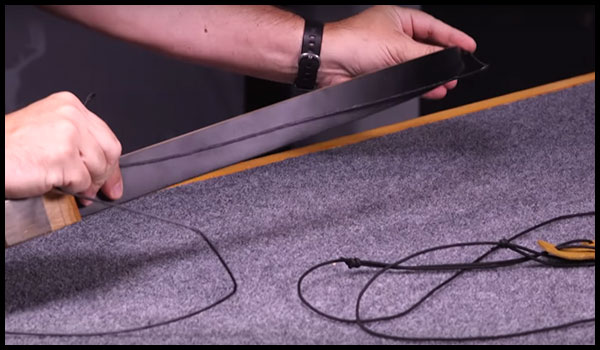
- The Limbs – These are the detachable pieces that you can change if you need a change in draw weight. As you keep using the bow more and more, your physique will keep improving and thus you will be able to handle a higher draw weight. That’s when you need to replace the bow limbs. Limbs are built with wood, carbon fiber or fiberglass. The limbs are joined to the riser’s both ends. The movement of the limbs is crucial for the bow’s accuracy. They store and discharge the driving force for launching the arrow to its target. A twist in the movement can change the arrow’s direction and your score will be poorer. The pressure produced by the stiffness of the limbs is generally at the 24 inches’ draw length. Several assembled methods are available to attach them while ILF (International Limb Fittings) is the most familiar one. Limbs can be attached to risers from several companies by using ILF.
- The Sight – It is the gadget you require to connect on the riser to have more accurate shots. The pins which are adjustable can make an immense difference when launching more arrows in a row.
- The Stabilizer System – The stabilizer gives a smooth and balanced feel to the bow during and after you make the shot. The stabilizer system helps to absorb the bow’s vibration and also reduces the redundant noise of releasing the arrow. It includes short rods, long rod, an extra rod as extension, v-bar and weights. Keep in mind, putting too many stabilizers might have a negative impact on your bow’s control while making a shot.
- V-bar – It is a connective portion of the system connecting the short rods of the side with the long rod.
- Arrows Rest –It’s a place for arrows’ resting during the archer’s drawing the string back. This part is built of metal or plastic and it is joined to the riser.
- The Bowstring – the bowstring is a cordage joined to the tips of the limb which transforms the limbs’ stored energy into the arrow’s dynamic energy. The bowstring can be (and should be) replaced when it gets worn out, loses its elasticity a bit and god-forbid, breaks.
- Nock – An arrow’s plastic-built two-pronged ends enabling it to be joined to the string of the bow. You can join it to the arrow with the help of a nock pin. Nocking rings are crucial to inform you where to place your arrow to get the same accuracy every time.
Other advanced attachments are best left for more advanced users. For beginners learning how to assemble a recurve bow, we’d best leave those for another time.
Tools You Will Need
When you’re just a beginner in archery, it can be confusing to know what tools you should and should not get right now. You will find a ton of fancy and not-so-fancy tools out there, but some of it you will really won’t need until you build up your skill level a bit.
The tools you will require as a beginner are as follows:
a) A bow square– Preferably with ruler markings. If it doesn’t have them, get and actual ruler as well. A bow-square made of aluminum is the best instrument for your nock placement and string tuning needs. You have to exactly check brace height of string to set the point of nocking. For brace height a bow square will measure 6-12″ and for setting nock point the height will be up to 5/8″.
b) Nocking ring Crimping Tool-It is recommended. However, regular pliers would work as well, with a bit of careful handling.
c) Bow-stringer– It is absolutely recommended. It eliminates twisting limbs on a recurve bow. The bow stringer on a recurve bow has a lower limb pocket which is extra long to ensure durability. It also has a rubber pressure pad which is non-slippery for your recurve bow’s safe stringing as well as unstringing. However, we are going to include alternative methods up ahead.
d) A screw tightener– Not required for some. A screw tightener maybe a wrench, a screwdriver or an Allen wrench.
Assembly instructions
-
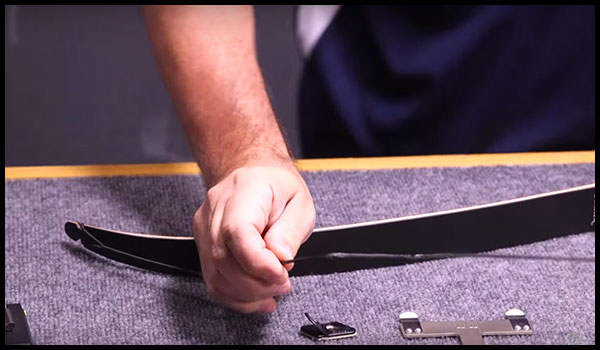
- Identify the lower limb and the upper limb. Different products come with different identifiers. For example: Samick Sage Takedown Recurve Bow comes with the Samick Sage logo on the bottom limb while the top limb does not have a logo. Refer to the user manual to identify them.
-
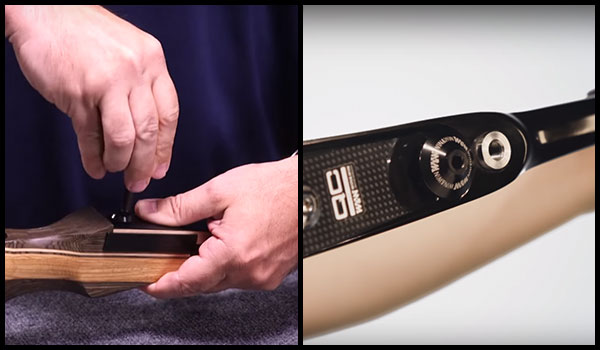
- Attach the bottom limb to the bottom part of the riser as shown in the image. (Add an image here). Some recurve bows’ limbs snap in automatically, some are attached using bolts and the others with different screws. Auto-snapping limbs are pretty straightforward. For the ones using bolts, hand tighten only. For the ones using screws, use screw driving tools.
-
- Attach the top limb on the top in a similar manner.
-
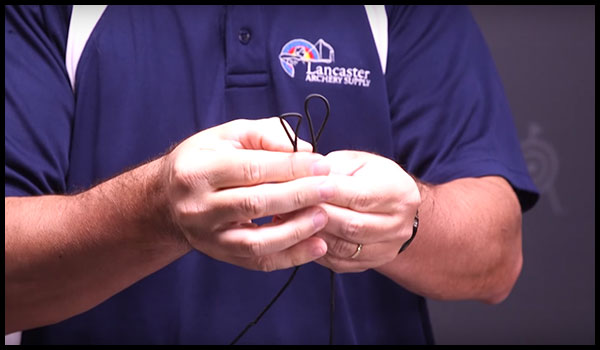
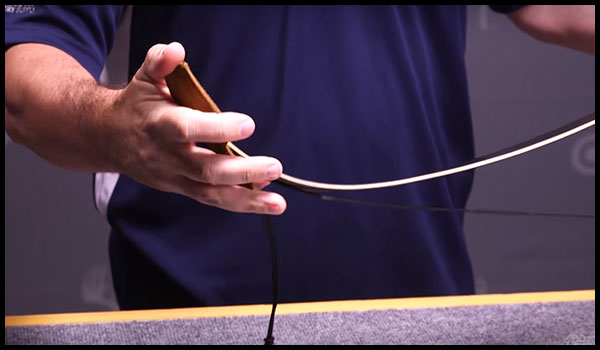
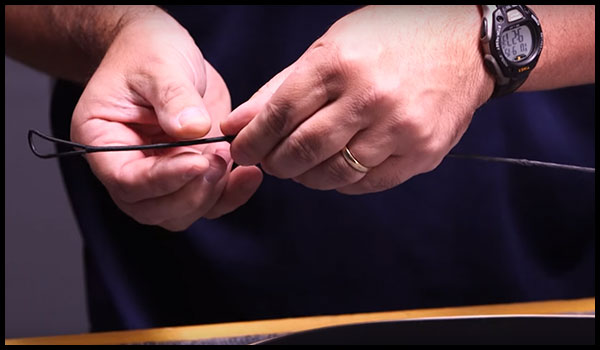
- Take the bowstring and see if they came pre-looped. If your bowstring already has loops in the end, notice how a loop is larger than the other. If your bowstring, however, doesn’t have a loop, create a bigger loop on one end and a smaller on the other.
-
- Pull the bigger loop through the lower limb, way past the notch for the bowstring.
-
- Attach the smaller loop on the notch of the top limb. Now, the bowstring will be slack.
-
- Take your bow-stringer and insert the top notch (with the smaller loop placed inside) into the smaller holster of the bow-stringer.
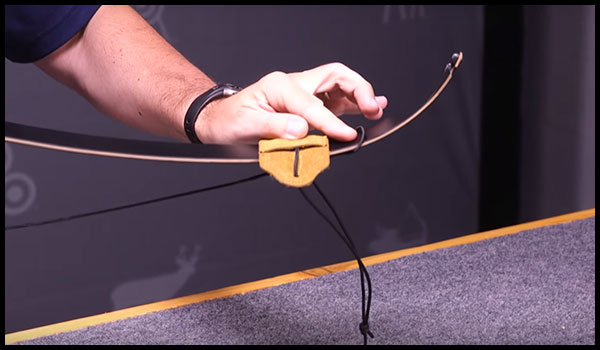
-
- Take the longer ended loop of the bow-stringer and pass it through the bottom limb.
-
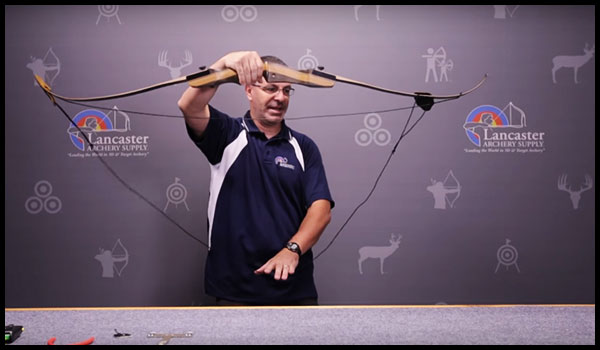
- Hold the bow horizontally at arm’s length, gripping the riser tightly with your dominant arm.
-
- Step down onto the stringer and pull the bow up, making the bowstring even more slack.
-
- Now, push the bottom loop of the bowstring into the notch and slowly lower the bow, tightening the string.

-
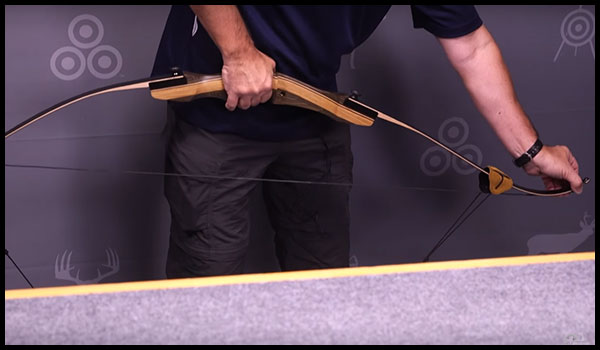
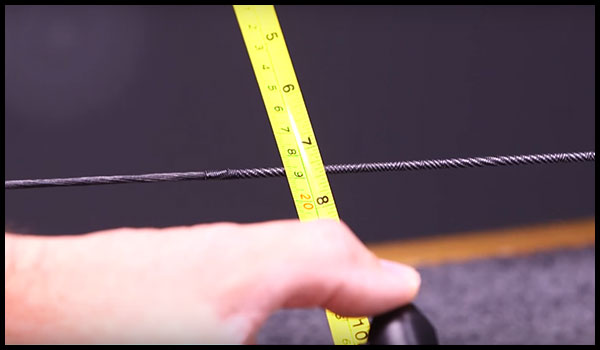
- Now, measure the brace height of the bow. It’s the distance between the riser and the bowstring. Refer to the user manual to check the specifications and find out the perfect/suitable brace height for your model of the bow.
-
- if your brace height is too low, you have to unstring the bow using the bow-stringer, twist the end of the bowstring a few times (7-8 times) and re-string it and measure the brace height. The brace height should increase.
-
- If the brace height is too high (Which generally wouldn’t be the case with pre-looped bowstrings) You either would need to unfasten the loops and redo them with smaller loops, or get a new bowstring altogether.
- Once you have tuned your brace height according to the specifications, you should now move on to attaching your arrow rest. For some recurve bows, the riser comes with a built-in arrow rest. For the others, you’d have to place the arrow rest on the appropriate position and attach it using either screws or bolts. Some arrow rests comes with double-sided tapes in the back for just pasting them on. For paste-on rests, there will be round markers to guide you to the proper placement. Just align the symbols on the rest and the riser and paste on.
-
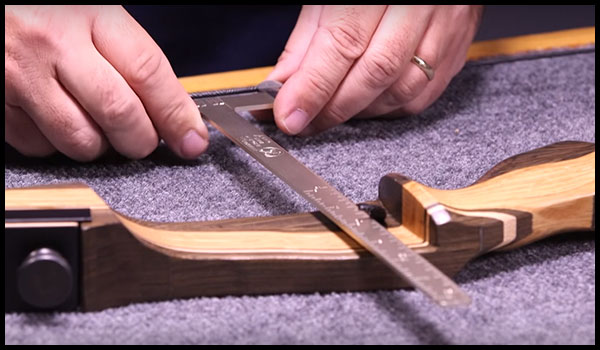
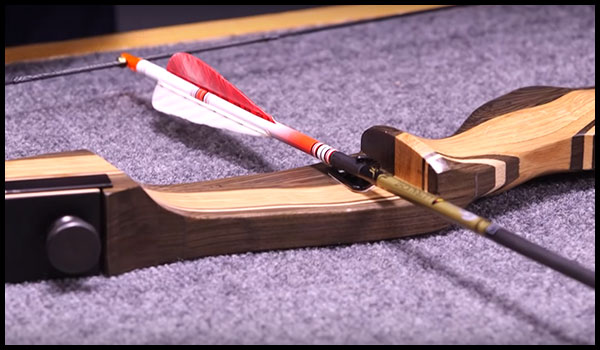
- Align your bow-square with the arrow rest, letting the perpendicular line go straight down onto the bowstring. This will allow you to find the perfect spot to place your arrow on, so that the arrow is pointing straight from the bowstring to the arrow rest.
-
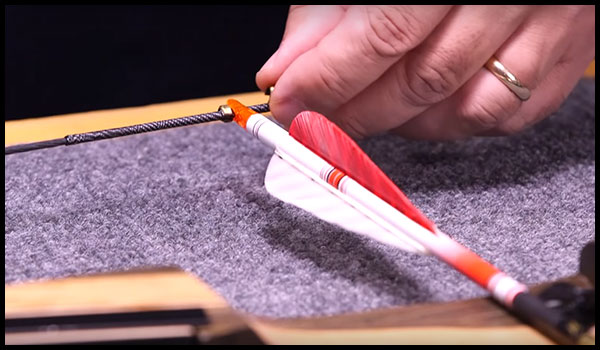
- Nock an arrow on the position you have just found using the bow-square.
-
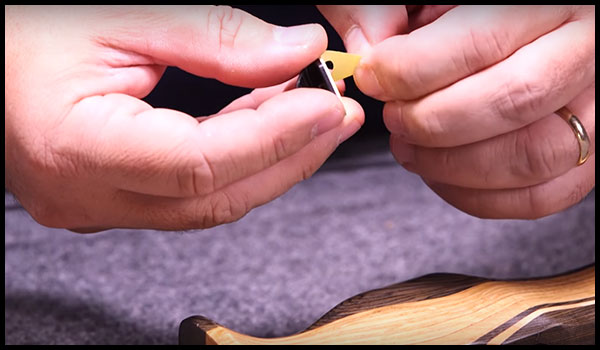
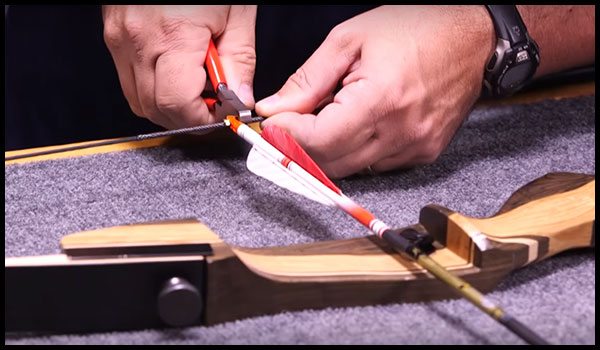
- Attach the two nocking rings right below and above the point where the arrow is nocked. Make sure to leave a very small gap instead of making them a tight fit with your arrow. Because different types of arrow might have different radii.
- Once you are satisfied with the positioning, use the crimping tool or pliers to crimp them down onto the bowstring.
Alternative Methods on How to String a Recurve Bow
- Alternately, if your bow didn’t come with nocking rings, you can use electrical tapes or even strings to mark down your nocking space.
- If you want to know how to string a recurve bow without a stringer, follow the method below. However, it is highly recommended to use a bow stringer as the following method can damage and reduce the lifespans of the bow limbs.
- String the bow in a slack.
- Stand with your feet apart.
- Rest the lower limb’s back against the shin of your non-dominant leg. (Bow’s back side is the side facing away from you while shooting. Belly side is the side that you can see when shooting.)
- Bring the bow’s top limp through between your legs and behind your dominant leg. The riser’s belly should be resting on your hamstring or thigh. You are using your hamstring as the pivot and your dominant arm and non-dominant shin as bow stringers.
- Now, use your dominant hand to pull the top limb from behind you and up to your front, creating a nice slack for you to slide the loop onto the notch.
- Once strung, slowly bring the bow back to its original place and step out.
Working as well as nurturing hobbies will make your life enjoyable. If archery is your favorite hobby and you the prefer takedown recurve bow over a compound bow because of its unique shape and look, you are meant for this article. After reading it you are ready to start using your recurve bow. Make sure to check out here about things to know before delving into archery as well for more dos and don’ts.


")


