
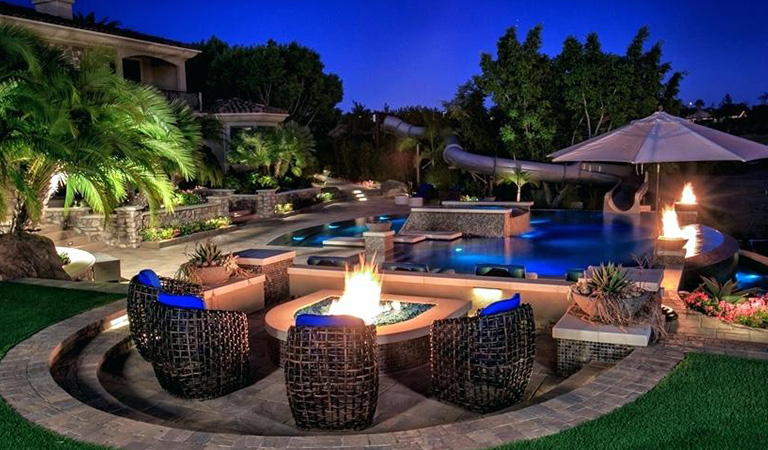
Backyard fire pits set the perfect scene for any evening; be it the night of an event, or just a late night backyard hang-out between friends. By functioning as both a source of warmth and a centerpiece, a fire pit can transform not only your garden, but your very routine; coaxing you outdoors to admire your handiwork and bask in the glow against the night. Fire pits have gained recent notoriety online due to the ease with which they can be constructed, as well as of course, their aesthetic appeal.
You may be wondering exactly, how to DIY fire pit cheap way and on a limited budget. Despite being so popular, fire pits remain economical to construct; by simply using materials already in your backyard as well as a couple cheaply bought items, constructing your very own fire pit has never been easier, or cost so little money!
This article will walk you through the easiest and cheapest way with which to build the fire pit of your dreams. Be sure to follow each step carefully and check your local regulations to ensure that you’re constructing something both permanent and beautiful.
How to Plan and Design Your Dream Fire Pit?
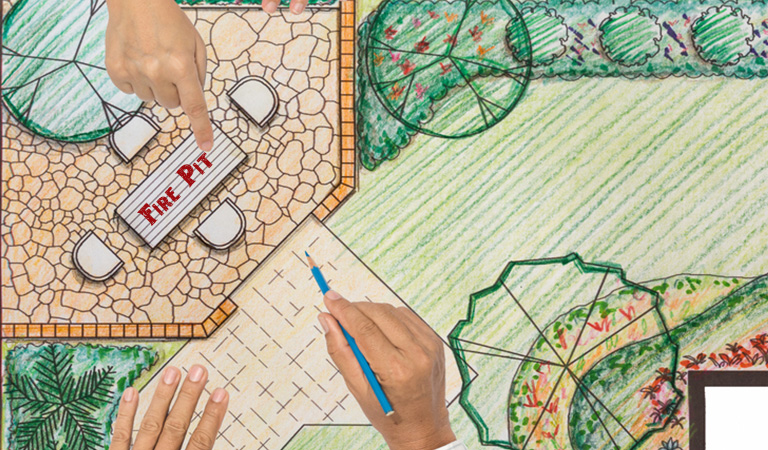
The very first step is to design. Designing a fire pit can be a really rewarding experience and process. The added degree of personalization means you can integrate your personal preferences into creating something just for you. Looking online can provide much inspiration, there are thousands of DIY fire pit ideas available; why not replicate Sauron’s Eye from The Lord of The Rings? If you’re not partial to geekery, stick with muted tones and natural slate to create an elegant, beautiful display.
Start with research, Pinterest is a fantastic resource for picture boards and can help you narrow down what exactly it is you’re looking for in your fire pit. You can also use Pinterest to create your own pin-board; this will be a vital reference when you’re finalizing your fire pit.
Once you feel sufficiently inspired, why not sketch exactly what it is you’re planning to construct. Having a hard-copy of your design will a really helpful reference when you’re actually outside the building. Be sure to add any measurements on your design, as well as maybe making a quick list of extra materials you’re planning to add.
A popular extra material may be Fire-Glass. Fire-Glass makes an amazing addition to any fire pit, the very concept of crystals on fire sounds incredible! However, Fire-Glass is not cheap, and therefore, it’s wise to carefully budget what fuel source you feel would fit your means.
Before making the final plans, make sure you know the fire pit type you are going to build. You can either make your fire pit expensive with luxurious metals or if you’re planning to stay as cheap as possible, cinder-blocks are really affordable and can be bought in sufficient quantity at around 40 USD price range. Coal or timber make cheaper fuel sources whilst still looking stylish.
Decide where you’re going to source your materials from and make a shopping list for easy reference.
Above all, make your plan clear, neat and legible so that if necessary, others can read it too whilst building without you having to decipher anything.
Local Regulations and Law
Once you have a concept or theme it’s important to take a step back and refer to your area code. A few standard legal requirements are explained below, but please note that these may not be consistent from state to state and it is paramount that you check with your local governing body.
A fire pit needs to be constructed from fireproof material on a flat and level area, as well as be situated at least 10-15 feet away from a house, and around 5 feet from any combustible item (trees/plants). Local building codes are not lenient with fire pits; this means that you will have to fully research what your local governing body entails as a requirement.
Some typical requests may consist of an outer ring of sand or gravel around the pit to reduce risk. Burning household waste is not permissible due to the fumes that will be emitted at your neighbor’s inconvenience. Some also prohibit building the fire pit within decking, so ensure that you have an allocated place within your backyard before you begin.
Once you’ve reviewed your local area code, it’s a good idea to refer back to your design and change materials to comply with standards, or even just sketch in a sand/gravel encirclement if needed.
Style and Shape
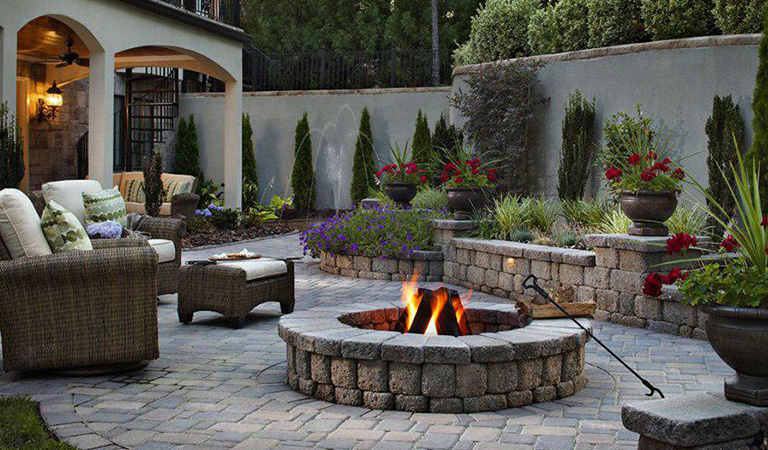
The style and shape of the fire pit is completely up to you! It’s worth noting that this article will be explaining the construction of a circular stone fire pit with a 30-40 inch diameter; the instructions will be clear and are more than adaptable for any changes you might think to add. Be sure to plan carefully and double-check any changes to materials. Most importantly the fire pit’s design should complement the surrounding ambiance. If you’re planning on making a fire pit in a clumsy backyard, it will surely look odd no matter how well built your fire pit is. Similarly, if you have a picture perfect lawn or backyard, even a simple design will look aesthetic.
Sticking with natural resources is the safest option for a limited fire hazard. Stone is a wonderful choice as it’s available in an array of textures, colors, and shapes. To be on the cheap side, why not take a trip to the beach and collect some small stones to add? Otherwise, if you’re lucky enough to live by a quarry, or even just have a sizeable backyard, sourcing your own stones is definitely not impossible.
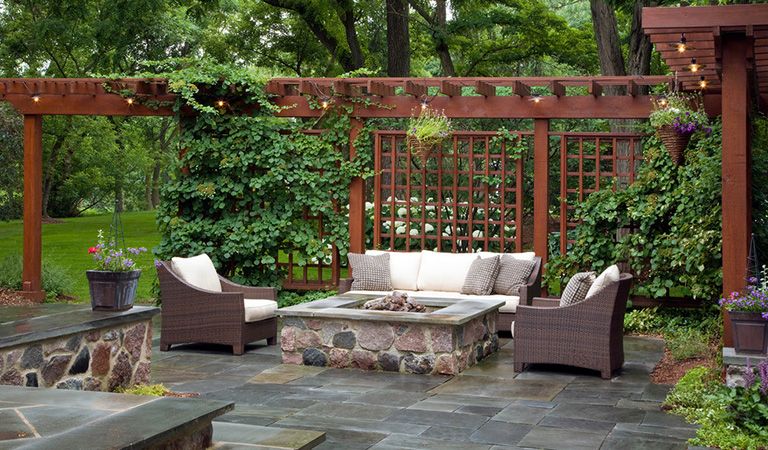
Rectangular or square fire pits have a strong modern appeal, and if you’ve opted for the cinder-block route, may be the simplest to construct.
If you love the idea of natural stone and have found a source, a circular fire pit should be more than easy to construct.
All options are open to you as the constructor of this project. Be sure to entertain any prospects that seem appealing to ensure that the centerpiece you’re creating will really enhance your garden, even when the fire pit itself is not active. If you are an expert in graphics designing, you can 3D model your pit even before starting the actual construction. There are lots of pro-level 3D modeling software available like 3DS, Maya, etc.
Now, here come the instructions on how to build a fire pit.
How to Build a Fire Pit?
What you’ll need:
- Sand
- Rocks (enough to pile 12 inches high)
- Spade/Shovel to dig
- A flat surface
- Chalk, or string and pins
- Measuring tape
- Refractory Mortar or Regular Mortar
Laying out an area
Decide on a space for the fire pit, ensuring it complies with local area regulations (i.e: far enough from your house or any trees) and is entirely level. If the area is not level, take steps to ensure that it is by either laying slabs or flattening the ground itself. Then, draw out the approximate size and shape of your fire pit using chalk or even by laying out/pinning string. A guided measurement for a circular fire pit would be 36-44 inches in diameter.
Preparing the inner pit
Once you have a measuring guide for your fire pit, dig a 12-inch deep hole within the shape. For example, the circle you’ll have measured must be dug into by 12 inches at its full 36-44 inch diameter. Once the pit itself has been dug, pour enough sand to fill at least a few inches of the hole and tamp until completely level.
Building the pit
Now use your chosen material (we advise stone due to its fire resistant nature, and pleasing aesthetic), lay stones around the perimeter of the hole. Stack the stones using a strong bonding agent, (refractory/fire mortar or mortar is really vital here – Don’t use cement!) until they reach at least 12 inches above the flat ground. You may then use a power tool to sand the stone till flat, or, lay flat stone slabs on top. Alternatively, the stones can be left as is for a rugged, earthy look.
Refining the inner pit
Now the tamped sand has settled completely, it’s time to top with even more sand. Pour an extra 4 inches of sand into the pit, fully covering the first layer. Doing this will help to extinguish the fire quickly and therefore ensure safety from risk.
An extra step
Although not essential, why not add a seating area around the fire pit using excess stones or materials. Bricks make a sturdy, long-lasting option, or why not try constructing a couple of hammocks to lounge in! Otherwise, grab some cushions and blankets and huddle around.
And voila! You have your very own fire pit, ready to fill with a responsible flammable source (timber or coal is great) and enjoy.
Extra Tips
Just as some final advice, despite our described fire pit being stunning, your personal customizations will ensure it is a garden centerpiece you can be totally proud of. Personalization doesn’t always have to be expensive either; why not save some money by painting the stone outside of the fire pit (with non-flammable paint of course), or simply using pre-cut stone shapes. Also, don’t forget to invest in a sheet cover for your fire pit; this will stop insects or even birds from accessing the pit when not in use.
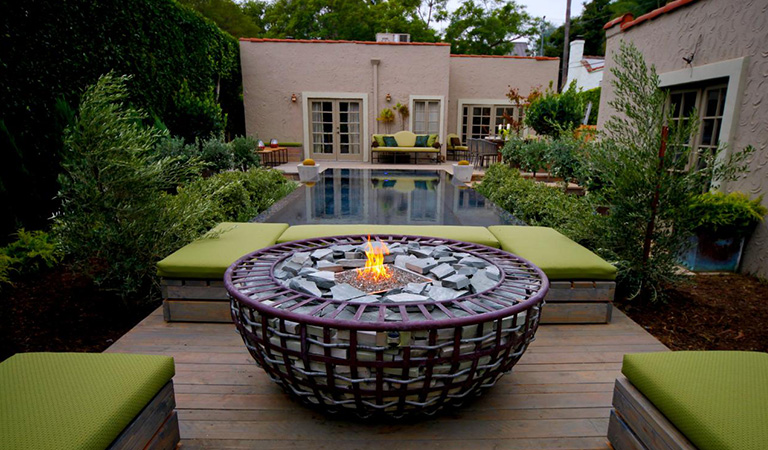
Alternatively, some use sheet metal for the walls of the pit (if you choose sheet metal, ensure that it’s non-corroding and completely fire safe). Sticking with a natural element such as stone will ensure that your fire pit will meld into the landscape and fit your backyard. Despite this, your finished result will emit the same, warming glow no matter how it looks.
We hope by following our instructions or even just by reading our article, you’ve been left inspired with visions of your ideal outdoor gathering knowing that it’s all more than possible now you know, how to DIY fire pit cheap way.


")


